

Have you ever walked from a comfortable living room into a sweltering upstairs bedroom or a freezing basement, only to adjust the thermostat yet again? For many homeowners, cranking up the furnace or blasting the air conditioner rarely solves the underlying causes of uneven room temperatures, muggy summer air, or persistent winter drafts. True, consistent comfort depends on far more than the number displayed on a wall controller. It relies on how effectively your house functions as an interconnected thermal system to generate, distribute, and retain conditioned air.
Achieving an ideal indoor climate requires balancing routine mechanical maintenance with targeted building-envelope upgrades, stretching from the peak of your roofline down to the subfloor of your lowest level. When your home’s outer shell is tightly sealed and your heating and cooling equipment is calibrated to match that load, you stop paying to condition the outdoors and start enjoying uniform temperatures in every room. Plan for the essential maintenance routines and high-impact structural improvements that eliminate energy waste, stabilize indoor humidity, and deliver reliable four-season comfort.
Optimizing Core Mechanical Systems for Year-Round Efficiency

Your home’s heating, ventilation, and air conditioning equipment acts as the respiratory system of the property, and keeping it running efficiently requires consistent, preventative care rather than reactive fixes. Implementing a strict spring and autumn diagnostic schedule ensures your equipment can handle extreme seasonal weather swings without straining components or spiking utility bills. During these biannual visits, technicians clean accumulated grime from outdoor condenser coils and indoor evaporator coils, flush condensate drain lines to prevent clogs and microbial growth, measure refrigerant subcooling and superheat levels, and test electrical capacitors and contactors under load. Establishing a recurring maintenance plan with reputable HVAC companies catches worn parts early, protects manufacturer warranties, and keeps your system operating near its peak rated efficiency.
Day-to-day control strategies also play a major role in eliminating temperature swings across different levels of your home. Pairing well-maintained equipment with thoughtful airflow management prevents the common scenario where the main floor feels frigid while upper bedrooms remain uncomfortably warm:
- Calibrate and relocate thermostats: Ensure wall controls sit on interior walls away from direct sunlight, supply registers, lamps, or drafty hallways, as false readings cause equipment to cycle inaccurately.
- Deploy remote room sensors: Smart thermostats with wireless sensors average temperatures across occupied spaces or prioritize bedrooms at night and living areas during the day.
- Adjust seasonal balancing dampers: Locate manual dampers on your main supply trunks and partially close ground-floor runs during summer to push cold air upstairs, then reverse the setting in winter as warm air rises.
- Match filter efficiency to static pressure: Upgrade to pleated MERV-11 or MERV-13 filters to capture fine particulates, provided your blower motor can handle the added airflow resistance without choking system performance.
Even the most efficient furnace or air conditioner cannot deliver comfort if conditioned air leaks into unconditioned spaces before reaching your living rooms. Inspect exposed supply and return ductwork in basements, attics, and utility closets for separated seams, crushed flex ducts, or failing adhesive. Strip away dried-out cloth duct tape—which deteriorates rapidly under temperature swings—and seal every joint and boot connection with fiber-reinforced UL-181 mastic sealant or heavy-duty foil tape. Pay close attention to early warning signs of mechanical strain, such as frequent short-cycling, rattling from the blower housing, humidity spikes, or weak airflow at distant registers. Scheduling prompt HVAC repairs as soon as these symptoms appear prevents minor component failures, like a weakened capacitor or sticking relay, from cascading into a costly compressor or blower motor burnout.
Executing Seasonal Tune-Ups and High-Efficiency Equipment Upgrades

As mechanical systems age, their capacity to regulate both sensible temperature and latent moisture steadily declines. Knowing how to prepare legacy heating equipment for winter—and recognizing when an aging cooling unit has reached the end of its economical lifespan—is essential for maintaining dependable indoor climate control.
Before the first hard freeze arrives, combustion and hydronic heating systems require a thorough safety and performance inspection. Heat exchangers inside gas furnaces expand and contract thousands of times each season, and microscopic stress cracks can allow combustion gases to enter the indoor airstream. A comprehensive autumn tune-up includes inspecting the heat exchanger, cleaning flame sensors and hot-surface igniters so the burner lights reliably, verifying gas manifold pressure, and testing carbon monoxide detectors on every floor. For homes heated with boilers, purging trapped air from hydronic radiators and checking expansion tank pressure restores even heat distribution across every room. Handling minor heating repairs in early autumn ensures safe, uninterrupted operation and spares you from emergency shutdowns during mid-winter cold snaps.
Protecting thermal energy along its distribution path is equally critical once heat is generated:
- Wrap exposed supply ductwork: Metal or flex ducts routed through unconditioned garages, attics, or vented crawlspaces should be wrapped in R-8 foil-faced insulation to prevent heat loss before air enters living spaces.
- Insulate hydronic piping: Sliding closed-cell foam sleeves over accessible hot-water pipes keeps water temperatures steady from the boiler to the furthest baseboard convector.
- Verify combustion air and flue venting: Ensure exhaust flues are free of debris or corrosion and slope properly so condensation drains safely without corroding metal vent pipes.
Eventually, continuing to patch an outdated cooling system yields diminishing returns. If your central air conditioner is over 12 to 15 years old, relies on phased-out refrigerants, or struggles to keep indoor humidity below 55 percent on muggy afternoons, upgrading to modern inverter-driven equipment transforms indoor comfort. Unlike single-stage units that blast at full capacity and shut off abruptly, variable-speed air conditioners and cold-climate heat pumps modulate output in tiny increments. Running at lower speeds for longer cycles eliminates temperature swings, reduces noise, and pulls far more moisture from the air. Quality ac system installations depend on careful engineering rather than guesswork, starting with a room-by-room Manual J load calculation to avoid oversizing, paired with properly sized ductwork, new insulated refrigerant line sets, and precise airflow commissioning.
Fortifying Your Attic and Roofline Against Thermal Loss
Your home’s roofline and attic represent the primary battleground for thermal retention. Without an airtight barrier and adequate insulation above your living space, conditioned air escapes effortlessly while outdoor extremes radiate downward through your ceilings.
A major culprit behind winter drafts and high heating bills is the stack effect—a physical process in which warm indoor air rises and escapes through gaps in the attic floor, creating negative pressure that pulls cold outdoor air in through basement rim joists and window frames below. Before adding new insulation, air-seal every penetration connecting the living space to the attic. Use fire-rated expanding foam and rigid foam board to seal around plumbing vent stacks, electrical wire chases, exhaust fan housings, chimney gaps, and recessed can lights (ensuring non-IC-rated fixtures are boxed with approved clearance). Weatherstrip and insulate the attic hatch or pull-down stair cover so it does not act as an uninsulated opening in your ceiling.
Once air leaks are sealed, upgrading attic insulation to climate-appropriate benchmarks—typically R-49 to R-60—dramatically slows conductive heat transfer:
- Install rigid soffit baffles: Before blowing in loose-fill cellulose or fiberglass, staple rigid foam or cardboard baffles into every rafter bay at the eaves so insulation cannot spill over and block intake airflow.
- Protect roof assemblies from moisture: Lifted shingles, cracked neoprene plumbing boots, and deteriorated step or chimney flashing allow rain and snowmelt to seep into the attic, matting down wet insulation and ruining its R-value. Scheduling timely roof repair keeps decking dry and preserves the thermal integrity of your attic insulation.
- Incorporate radiant barriers and cool-roof materials: During a roof overhaul, radiant barrier sheathing and high-reflectance shingles with an elevated Solar Reflectance Index bounce solar radiation away rather than absorbing it into attic framing.
Passive attic ventilation ties the entire roof assembly together. Continuous ridge vents paired with unobstructed soffit intake vents allow cooler outside air to enter along the eaves and flush superheated air out at the peak. Consulting experienced roofing contractors helps calculate net free vent area requirements and select synthetic underlayments that prevent ice dams in winter while dropping peak summer attic temperatures by up to 30 degrees Fahrenheit, taking strain off second-floor cooling zones.
Eliminating Window Drafts and Controlling Solar Heat Gain
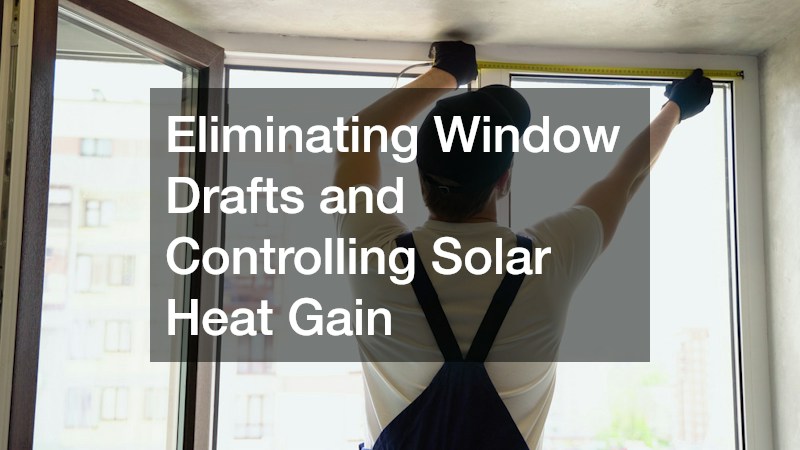
Windows are the thinnest thermal barrier in your exterior walls, often accounting for a disproportionate share of winter heat loss and summer solar heat gain. Upgrading failing glazing assemblies and managing solar radiation through existing glass are high-impact ways to stabilize room temperatures.
Recognizing when windows are compromising your indoor climate starts with a close visual and tactile inspection. Persistent fogging or condensation trapped between double panes signals a failed perimeter seal and the loss of insulating gas fill, while warped sashes, cracked glazing putty, and brittle weatherstripping allow cold drafts across seating areas. On a windy winter day, holding an incense stick or thermal leak detector along frames reveals hidden air infiltration. When shopping for upgraded units, focus on National Fenestration Rating Council metrics—specifically a low U-factor to block conductive heat loss and a Solar Heat Gain Coefficient tailored to regional sun exposure. Full-frame window replacement using thermally broken fiberglass, composite, or multi-chamber vinyl frames paired with double- or triple-pane Low-E glass and inert argon gas fills eliminates perimeter drafts, dampens outdoor noise, and raises interior glass surface temperatures so sitting near a window feels comfortable year-round.
Not every home requires full unit tear-outs to tame excessive heat and glare, particularly when existing frames are structurally sound and airtight:
- Target west- and south-facing exposures: Rooms receiving direct afternoon sun routinely overheat by five to ten degrees compared to shaded rooms, forcing cooling equipment to overwork while leaving the rest of the house chilly.
- Evaluate spectrally selective film technology: Modern ceramic and dual-reflective window films reject 70 to 80 percent of infrared solar heat and block up to 99 percent of fabric-fading ultraviolet rays without turning glass into dark mirrors.
- Preserve natural daylight and views: Unlike heavy blackout drapes that darken rooms, high-clarity architectural films maintain outward visibility and natural light while flattening afternoon temperature spikes.
For homeowners seeking immediate relief from radiant heat without the cost or disruption of construction, professional residential window tinting provides a durable upgrade that balances temperatures across sun-drenched spaces.
Upgrading Exterior Walls and Interior Surfaces for Thermal Stability
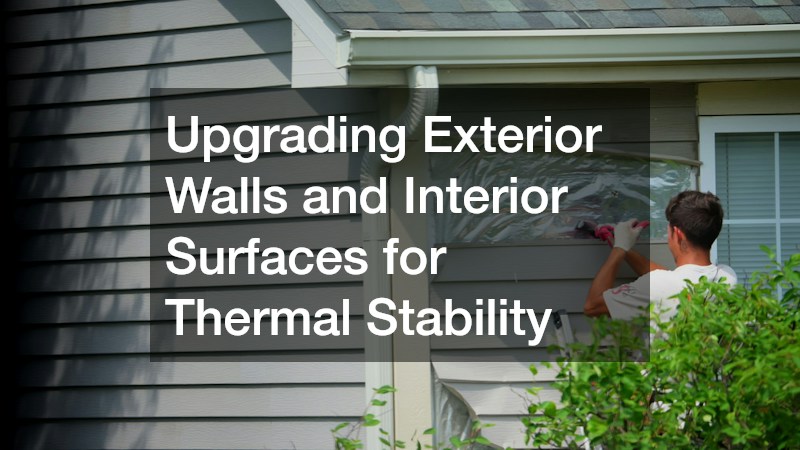
Even when your attic is heavily insulated and mechanical systems are finely tuned, poorly insulated exterior walls and cold floors create persistent discomfort. Solid surfaces exchange radiant heat directly with your body, meaning cold walls and subfloors make a room feel chilly even when the air temperature reads 70 degrees.
One hidden weakness in conventional wood- or steel-framed homes is thermal bridging. Because framing studs conduct heat much faster than fiberglass or cellulose cavity insulation, every stud acts as a thermal highway transferring outdoor cold or heat straight through walls. Wrapping the exterior in continuous rigid foam board—such as extruded polystyrene, polyisocyanurate, or rigid mineral wool—breaks that conductive path across the entire wall surface. During an exterior renovation, pairing continuous insulation with a taped weather-resistive barrier and properly lapped window pan flashing stops wind washing and air infiltration through wall cavities. Working with knowledgeable siding companies enables you to combine insulated vinyl, fiber cement, or engineered wood cladding with continuous rigid foam sheathing, elevating curb appeal while boosting effective wall R-value and acoustic comfort.
Down at floor level, rooms over unheated basements, vented crawlspaces, or cantilevered garages often suffer from cold surfaces during winter:
- Air-seal and insulate rim joists: Applying closed-cell spray foam or rigid foam blocks sealed with canned foam along the basement perimeter rim joist stops frigid outdoor air from infiltrating between floor joists.
- Select thermal flooring underlayments: Beneath floating engineered hardwood or luxury vinyl plank, high-density closed-cell foam or natural cork underlayments create a thermal break that blocks cold subfloor radiation.
- Install electric radiant heating mats: In tiled bathrooms, mudrooms, or kitchens, ultra-thin low-voltage electric radiant mats embedded in thin-set mortar deliver gentle warmth where bare feet land each morning.
Proper subfloor preparation determines how well these upgrades perform over time. Skilled flooring installers level uneven decking, seal perimeter expansion gaps along baseboards to stop upward drafts, and match each surface material with compatible thermal underlayments for lasting underfoot warmth.
Complete, effortless indoor climate control never comes from a single thermostat tweak or standalone gadget. Instead, it emerges from aligning well-maintained mechanical heating and cooling equipment with a tightly air-sealed, continuously insulated building envelope. When your roof, walls, windows, and floors hold onto conditioned energy effectively, equipment runs shorter, quieter cycles and keeps every corner of the house comfortable.
To put this whole-home strategy into action without feeling overwhelmed, prioritize improvements in logical phases. Begin with low-cost, high-return maintenance tasks—such as sealing accessible ductwork, replacing worn weatherstripping, air-sealing attic bypasses, and scheduling seasonal tune-ups—before budgeting for larger envelope and equipment investments. This week, walk through your home during the hottest or coldest part of the day, identify the two rooms with the worst temperature swings or drafts, and tackle the highest-impact fix on your list first.