

Taking on a major home renovation is exciting, but it also carries real financial risk if things go wrong along the way. A single overlooked detail, like an exposed roof deck during a storm or a nicked water line behind drywall, can turn a dream remodel into an expensive nightmare. Knowing where the common danger zones are, and how to protect your home before and during construction, can save you thousands of dollars and weeks of delay. This guide walks through the most vulnerable areas of your home during a renovation and what you can do to keep them safe.
Start With a Detailed Pre-Renovation Walkthrough
Before any demolition begins, walk through your home with your contractor and document the condition of every room, fixture, and system. Photos and notes create a clear record that protects you if a dispute arises later about pre-existing damage versus new damage caused during the project. This walkthrough also helps you identify weak points, such as aging wiring or soft spots in flooring, that could become bigger problems once construction stress is added.
Use this walkthrough to build a punch list of items that need special protection or extra caution, like delicate tile work or built-in shelving near a demo zone. A thorough pre-project assessment sets the tone for accountability and gives everyone involved a shared understanding of what needs to be preserved.
Protect Your Roof Before Storms or Structural Work Begin

The roof is one of the most vulnerable parts of your home during a major renovation, especially if the project involves adding a second story, skylights, or structural changes to the attic. Even a short delay in covering an open section can lead to roofing leaks that damage insulation, drywall, and framing below. A single unexpected downpour on an uncovered deck can soak hundreds of dollars in materials within minutes and stall the entire timeline.
Always confirm with your contractor how the roof will be tarped or temporarily sealed at the end of each workday, particularly during unpredictable weather seasons. Ask specifically about the grade of tarp being used, how it will be anchored against wind gusts, and whether battens or sandbags will secure the edges. Heavy-duty, reinforced tarps rated for at least 6-mil thickness tend to hold up far better than lightweight versions that tear or lift in a storm.
It also helps to set clear expectations for daily wrap-up procedures rather than assuming the crew will handle it automatically. Request that any exposed decking be covered before the crew leaves, not just when rain is already in the forecast, since weather can shift quickly. If your project spans a rainy season, ask whether the contractor plans to work in phases that limit how much roof surface is open at any given time, reducing your overall exposure to sudden storms.
If your renovation includes attic or roof modifications, ask about proper wind vented roof installation to ensure the finished structure can handle airflow and pressure changes without compromising shingles or underlayment. This is especially critical in regions prone to high winds or coastal storms, where uneven pressure can lift shingles or force wind-driven rain beneath the roofline. A qualified contractor should calculate the correct balance of intake and exhaust ventilation, typically following the 1:150 or 1:300 attic ventilation ratio, depending on whether a vapor barrier is present.
A poorly vented roof can trap moisture, leading to mold growth, rotting decking, and premature material failure long after the renovation is complete. Warning signs often don’t appear until years later, when homeowners notice peeling paint, sagging roof lines, or unexplained increases in energy bills from a struggling HVAC system.
Before work begins, ask your contractor how they plan to verify airflow once construction is finished, whether through smoke testing, thermal imaging, or manufacturer-specified vent spacing. Getting this detail right the first time prevents costly rework down the road, including full roof tear-offs that can run into the thousands of dollars.
-
Confirm end-of-day tarping procedures with your contractor, including who’s responsible if weather turns unexpectedly overnight
-
Ask how long the roof will remain open during structural work — most reputable contractors limit exposure to a single day whenever possible
-
Request a written weather contingency plan for multi-day openings, especially during storm season
-
Check that flashing and underlayment are inspected before closing up the roof, since hidden leaks here often surface months later as rot or mold
-
Discuss ventilation requirements for attic renovations in advance, including ridge vents, soffit vents, or baffles needed to prevent moisture buildup
-
Verify your contractor carries adequate insurance to cover interior water damage if the roof is compromised during the project
Keep Your HVAC System Protected From Dust and Debris
Construction dust is one of the most underestimated threats to a home’s heating and cooling system. Drywall dust and debris can clog filters, coat coils, and infiltrate ductwork, leading to reduced efficiency and costly repairs after the project wraps up. Before work begins, seal off vents and returns in active construction zones with plastic sheeting and tape to keep particles from circulating throughout the house.
It is also worth stocking extra filters and basic hvac supplies before the project starts, since you may need to change filters more frequently than usual during heavy demolition phases. Running the system on a lower fan setting during dusty work, or shutting it off entirely during major demo days, can further reduce strain on the equipment. A little preparation here avoids an expensive system flush or coil cleaning once construction ends.
Prevent Plumbing Mishaps Behind Walls and Under Floors

Plumbing lines hidden behind walls or under flooring are easy to overlook until a contractor accidentally punctures one during demolition. Water damage from a hidden leak can spread quickly, ruining subfloors, drywall, and even electrical systems before anyone notices. Before cutting into any wall near a kitchen, bathroom, or laundry area, always confirm the exact location of supply and drain lines.
Hiring licensed plumbing contractors to map out or temporarily cap lines in renovation zones is one of the smartest investments you can make during a major remodel. They can also pressure-test the system afterward to confirm there are no slow leaks before walls are closed back up. This small step upfront can prevent a much larger repair bill and potential mold remediation later.
-
Request a plumbing map before demolition begins near wet areas
-
Ask about capping or rerouting lines during extended projects
-
Schedule a pressure test before walls are closed
-
Keep shutoff valve locations accessible throughout the project
Shield Flooring and Surfaces From Construction Traffic

Heavy foot traffic, dropped tools, and dust are constant threats to floors that are not part of the current renovation phase. Hardwood, tile, and especially carpet can suffer scratches, stains, or crushing damage if left unprotected during a long project. Laying down heavy-duty floor protection or plywood walkways in high-traffic paths is a simple way to preserve surfaces that were not meant to be touched.
If your existing carpet does get damaged despite precautions, it is often more cost-effective to plan for local carpet replacements in that specific area rather than paying for repairs that may not match the original material well. Discuss with your contractor upfront which rooms will see the most foot traffic so you can decide whether removing and storing carpet temporarily makes more sense than trying to protect it in place.
Handle Custom Features With Extra Care
Renovations often involve high-value custom elements—cabinetry, built-in shelving, stone countertops, or custom millwork—that are expensive to replace if damaged, so these areas deserve dedicated protection plans. Custom cabinets, for example, are frequently installed toward the end of a project, but they can still be scratched, dented, or chipped by other trades working nearby if corners and edges are not padded. A single gouge in a hand-finished door panel can mean a repair bill running into the hundreds of dollars, or a shipping delay of several weeks if the piece must be remade.
Before installation begins, ask your contractor for a written plan detailing exactly how finished cabinetry, countertops, and trim will be shielded during remaining phases like painting, flooring, or tile work. Common safeguards include rosin paper or cardboard on countertops, corrugated plastic sheeting taped over cabinet faces, and foam corner guards on exposed edges. Make sure the protection stays in place until all dust-generating and paint-generating work is complete, since fine particulates can settle into finishes and are difficult to remove without scratching the surface.
It’s also worth walking the site with your contractor to identify other custom features—like designer lighting fixtures, mirrors, or specialty tile—that warrant the same level of care. Assign responsibility for covering and uncovering these items to a specific crew member so nothing gets overlooked between trade handoffs. Document the condition of these features with photos before work resumes each day, giving you a clear record if damage does occur.
Custom features often carry the highest replacement costs of any element in a renovation, so they deserve their own protection plan. Custom cut glass enclosures used in showers or room dividers require especially careful handling since they are often installed before other finishing work is complete. A single misplaced tool or ladder bump can crack or chip glass that was cut to precise specifications, and specialty pieces like frameless shower panels or textured glass dividers may take four to six weeks to reorder from a fabricator.
Cost is another reason to treat these installations with extra caution. A standard tempered glass panel can run several hundred dollars, but custom shapes, low-iron glass, or etched designs can easily exceed $1,000 per panel once fabrication and rush shipping are factored in. Beyond the dollar amount, any delay in reordering can stall inspections, plumbing sign-offs, or move-in dates that depend on the bathroom or room being finished.
Scheduling these installations as close to project completion as possible is one of the simplest ways to reduce risk. Clearly marking these areas as no-work zones for unrelated trades—using barrier tape, signage, or temporary plywood covers—further limits accidental contact from electricians, painters, or flooring crews still moving through the space. Assigning one point of contact to sign off before and after any nearby work also helps catch damage early, before it becomes an expensive surprise.
-
Install high-value custom features—like custom cabinetry, built-ins, or statement lighting—toward the end of the project, after messy trades like drywall and painting are complete
-
Use corner guards and rosin paper or padding around finished cabinetry, countertops, and millwork whenever other crews are working nearby
-
Mark glass installations, mirrors, and shower enclosures clearly with painter’s tape or warning labels so other trades don’t lean tools or materials against them
-
Confirm delivery and installation timing with suppliers to avoid long exposure to job-site dust, foot traffic, or theft
-
Schedule custom items for delivery within a day or two of installation rather than weeks in advance
-
Assign one trade or supervisor responsibility for protecting each high-value feature once it’s installed
-
Photograph custom pieces upon delivery and after installation to document condition and support any warranty or damage claims
Protect Fresh Paint and Ceiling Work From Ongoing Construction
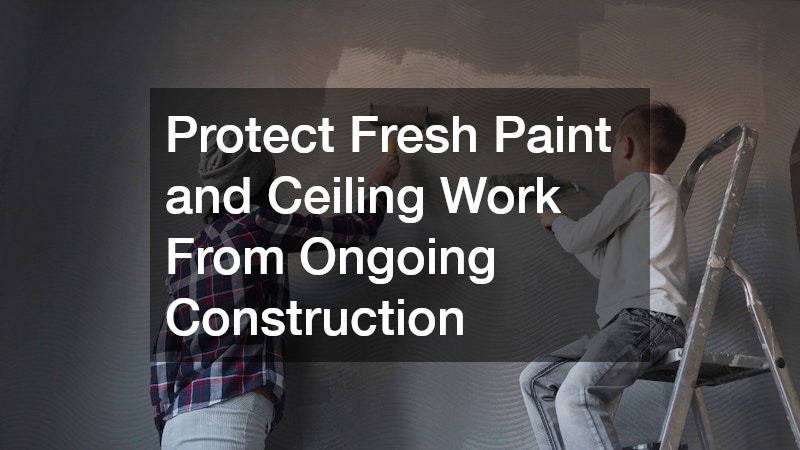
Once interior painters have completed a room, it is tempting to assume that work is finished and protected, but ongoing construction in adjacent areas can still introduce dust, splatter, and accidental scuffs. Drywall sanding two rooms away can send fine particles drifting through open doorways for days, settling into wet paint before anyone notices.
Newly painted walls should be given time to cure fully—typically 24 to 48 hours to dry to the touch and up to two to three weeks for a full cure—before heavy furniture or equipment is moved back into the space. Doorways should be covered with plastic sheeting or zippered dust barriers if work continues nearby, and painters’ tape can protect trim and freshly finished ceiling edges from stray tool marks.
Coordinating the painting schedule so it happens after messier trades, such as flooring, drywall, and electrical, have finished reduces the risk of costly touch-ups. If painting must occur earlier for scheduling reasons, budget for a final touch-up pass once all other work wraps up, rather than risking mismatched patches later.
Freshly painted walls and finished ceilings are especially vulnerable during the later stages of a renovation, when trades are still moving materials, running cords, and generating dust. Even a light film of drywall dust can dull a semi-gloss finish, while a single scuff from a ladder or tool cart can mean repainting an entire wall to avoid visible patchwork. Covering finished surfaces with breathable drop cloths, rather than plastic sheeting that traps moisture, helps protect paint without causing condensation damage.
Acoustic ceiling panels, often used in basements, home offices, or media rooms, are another finish that can be easily damaged by dust or moisture if installed too early in a project. These panels can absorb stains and odors if exposed to construction debris, and replacing damaged sections can be more noticeable than repairing solid drywall, since dye lots and material batches rarely match perfectly over time. Even brief exposure to airborne dust during sanding or cutting can settle permanently into their porous surface, degrading both appearance and sound absorption.
Scheduling ceiling panel installation near the end of the renovation timeline, ideally after flooring, painting, and any HVAC or electrical work above the ceiling line is complete, helps preserve both their appearance and their acoustic performance. Sealing off the work area with zip walls or temporary barriers during any remaining dusty tasks adds an extra layer of protection for these finishes.
Guard Outdoor Structures and Landscaping During Exterior Renovations
Exterior renovations, additions, and even interior projects that require equipment staging in the yard can take a toll on landscaping, irrigation lines, and fencing. Heavy machinery, material deliveries, and foot traffic can compact soil, damage sprinkler heads, or crack existing fence panels if the work area is not clearly defined. Marking boundaries with stakes or temporary fencing helps keep contractors and delivery trucks away from sensitive areas of the yard.
If your project involves replacing or extending fencing, working with an established vinyl fence company can help ensure the new fencing is installed correctly and positioned to avoid interference with other renovation work like grading or drainage changes. Vinyl fencing is also relatively low maintenance once construction dust and debris are cleaned up, making it a practical choice for homeowners who want to avoid ongoing upkeep after a major project. Confirming installation timing with your overall renovation schedule prevents new fencing from being damaged by later phases of work.
Build a Financial Cushion for Unexpected Damage
Even with the best planning, unexpected issues can arise once walls are opened or old systems are exposed for the first time. Setting aside a contingency budget of at least ten to twenty percent of your total renovation cost gives you breathing room to handle surprises without derailing the entire project. This cushion is especially important for older homes where hidden problems like outdated wiring or deteriorated framing are more common.
Reviewing your homeowner’s insurance policy before the project begins is another smart step, since some policies offer limited coverage for damage that occurs during renovations. Understanding what is and is not covered helps you decide whether additional builder’s risk insurance makes sense for your specific project. Being financially prepared reduces stress and allows you to make decisions based on quality rather than panic if something unexpected comes up.
-
Set aside a contingency fund before signing any contracts
-
Review insurance coverage for renovation-related damage
-
Ask your contractor about common hidden issues in homes of your age
-
Keep a small reserve fund available even after the project is declared complete
Preventing costly damage during a major renovation comes down to proactive planning, clear communication with your contractor, and knowing which areas of your home need extra protection. By addressing roofing, plumbing, HVAC, flooring, custom features, and finishing details before problems arise, you can keep your project on budget and on schedule. Take time now to walk through your renovation plan with these vulnerable areas in mind, and involve qualified professionals early so small risks do not turn into major expenses later.